第三章:Component组件认知与实践
概述
Cyber RT是一个高性能、高吞吐、低延时的计算运行框架,其中,动态加载技术和有向无环图(DAG)是其实现高性能重要途径之一。
Cyber RT采用了基于Component模块和有向无环图(DAG)的动态加载配置的工程框架。即将相关算法模块通过Component创建,并通过DAG拓扑定义对各Component依赖关系进行动态加载和配置,从而实现对算法进行统一调度,对资源进行统一分配。采用这个工程框架可以使算法与工程解耦,达到工程更专注工程,算法更专注算法的目的。
接下来,将结合实例对component模块进行相应的介绍。
3.1 什么是 Component
Component 是 Cyber RT提供的用来构建功能模块的基础类,可以理解为Cyber RT对算法功能模块的封装,配合Component对应的DAG文件,Cyber RT可实现对该功能模块的动态加载。以Apollo为例, Apollo 中所有的模块都由 Component 构建的。
被 Cyber RT加载的 Component 构成了一张去中心化的网络。每一个Component是一个算法功能模块,其依赖关系由对应的配置文件定义,而一个系统是由多个component组成,各个component由其相互间的依赖关系连接在一起,构成一张计算图。
下图是具有3个component,2个channel的简单网络:

3.2 Component 的类型
Component 有两种类型,分别为Component和TimerComponent。
Component提供消息融合机制,最多可以支持 4 路消息融合,当 从多个 Channel 读取数据的时候,以第一个 Channel 为主 Channel。当主 Channel 有消息到达,Cyber RT会调用 Component的Proc()进行一次数据处理。TimerComponent不提供消息融合,与Component不同的是TimeComponent的Proc()函数不是基于主channel触发执行,而是由系统定时调用,开发者可以在配置文件中确定调用的时间间隔。
3.3 Component 的创建及工作流程
1、包含头文件;
2、定义一个类,并继承Component或者time Component;根据Component功能需要,选择继承Component或者继承TimeComponent。
3、重写Init()和Proc()函数;Init()函数在 Component 被加载的时候执行,用来对Component进行初始化,如Node创建,Node Reader创建,Node Writer创建等等;Proc()函数是实现该Component功能的核心函数,其中实现了该Component的核心逻辑功能。
4、在Cyber RT中注册该Component,只有在Cyber RT中注册了该Component,Cyber RT才能对其进行动态的加载,否则,cyber RT动态加载时报错。
//1、包含头文件#include "cyber/component/component.h"#include "test/proto/examples.pb.h"// 2、定义一个类,继承以Driver和Chatter为参数的Component模版类class ComponentSample : public Component<Driver, Chatter> {public://3、重写Init() 函数和Proc() 函数bool Init() override;bool Proc(const std::shared_ptr<Driver>& msg0,const std::shared_ptr<Chatter>& msg1) override;};//4、 在cyber中注册ComopnentSampleCYBER_REGISTER_COMPONENT(ComponentSample)
3.4 Component 如何被加载
在 Cyber RT中,所有的 Comopnent 都会被编译成独立的.so文件,Cyber RT 会根据开发者提供的配置文件,按需加载对应的 Component。所以,开发者需要为.so文件编写好配置文.dag文件和.launch文件,以供 Cyber RT正确的加载执行Component。
Cyber RT提供两种加载启动Component的方式,分别是使用cyber_launch工具启动component对应的launch文件,和使用mainboard启动component对应的dag文件。
cyber_launch工具可以启动dag文件和二进制文件,而mainboard执行启动dag文件。

3.5 Component 的优点
相较于前几章在 main()函数中写通信逻辑并编译为单独的可执行文件的方法,Component 有以下优点:
- 可以通过配置 launch 文件加载到不同进程中,可以弹性部署。
- 可以通过配置 DAG 文件来修改其中的参数配置,调度策略,Channel 名称。
- 可以接收多个种类的消息,并有多种消息融合策略。
- 接口简单,并且可以被 Cyber 框架动态地加载,更加灵活易用。
3.6 Component 案例
本节将实现一个简单的 Component 实例,实现两路channel消息融合,并将两路channel消息编号依次打印到屏幕终端。
3.6.1 创建目录结构
apollo_workspace|--test|--common_component_example| |--BUILD // bazel编译文件| |--driver_writer.cc // 向driver channel中写消息的writer| |--chatter_writer.cc // 向chatter channel中写消息的writer| |--common_component_example.cc // component 源文件| |--common_component_example.h // component 头文件| |--common.dag // component 配置文件| |--common.launch // component launch文件|--proto|--BUILD // protobuf的编译文件|--examples.proto // protobuf|--BUILD|--test.BUILD|--cyberfile.xml
3.6.2 定义消息格式
首先定义通信的消息格式,在这里定义了两个消息格式:Chatter和Driver。
syntax = "proto2";package apollo.cyber.test.proto;message Chatter {optional uint64 timestamp = 1;optional uint64 lidar_timestamp = 2;optional uint64 seq = 3;optional bytes content = 4;};message Driver {optional string content = 1;optional uint64 msg_id = 2;optional uint64 timestamp = 3;};
BUILD文件如下所示
load("@rules_proto//proto:defs.bzl", "proto_library")load("@rules_cc//cc:defs.bzl", "cc_proto_library")load("//tools:python_rules.bzl", "py_proto_library")package(default_visibility = ["//visibility:public"])cc_proto_library(name = "examples_cc_proto",deps = [":examples_proto",],)proto_library(name = "examples_proto",srcs = ["examples.proto"],)
3.6.3 writer 的实现
本节中我们实现两个 Writer 分对别proto中定义的两种消息进行写出,即 driver_writer每2秒写出一条Driver数据; chatter_writer每3秒写出一条Chatter数据。
driver_writer 每秒写出 2 条 Driver 类型信息到“/apollo/driver” channel,代码如下:
#include "cyber/cyber.h"#include "test/proto/examples.pb.h"#include "cyber/time/rate.h"#include "cyber/time/time.h"using apollo::cyber::Rate;using apollo::cyber::Time;using apollo::cyber::test::proto::Driver;int main(int argc, char *argv[]) {// 初始化cyberapollo::cyber::Init(argv[0]);// 创建nodeauto talker_node = apollo::cyber::CreateNode("driver_writer");// 创建writer,写Driver类型消息auto talker = talker_node->CreateWriter<Driver>("/apollo/driver");// 新建计时器Rate rate(2.0);std::string content("apollo_test");while (apollo::cyber::OK()) {static uint64_t seq = 0;auto msg = std::make_shared<Driver>();// 创建一个Driver类型的消息并填入数据msg->set_timestamp(Time::Now().ToNanosecond());msg->set_msg_id(seq++);msg->set_content(content + std::to_string(seq - 1));talker->Write(msg);AINFO << "/apollo/driver sent message, seq=" << (seq - 1) << ";";// 休眠2秒,也就是每2秒发一次信息。rate.Sleep();}return 0;}
chatter_writer 每秒写出 3 条 Chatter 类型信息到"/apollo/chatter" channel,代码如下:
#include "cyber/cyber.h"#include "test/proto/examples.pb.h"#include "cyber/time/rate.h"#include "cyber/time/time.h"using apollo::cyber::Rate;using apollo::cyber::Time;using apollo::cyber::test::proto::Chatter;using apollo::cyber::Rate;using apollo::cyber::Time;using apollo::cyber::examples::proto::Chatter;int main(int argc, char *argv[]) {apollo::cyber::Init(argv[0]);auto talker_node = apollo::cyber::CreateNode("chatter_writer");// 创建writer,写Chatter类型消息auto talker = talker_node->CreateWriter<Chatter>("/apollo/chatter");// 创建计时器Rate rate(3.0);std::string content("apollo_prediction");while (apollo::cyber::OK()) {static uint64_t seq = 0;auto msg = std::make_shared<Chatter>();msg->set_timestamp(Time::Now().ToNanosecond());msg->set_lidar_timestamp(Time::Now().ToNanosecond());msg->set_seq(seq++);msg->set_content(content + std::to_string(seq - 1));talker->Write(msg);AINFO << "/apollo/chatter sent message, seq=" << (seq - 1) << ";";// 休眠3秒,也就是每3秒发一次信息。rate.Sleep();}return 0;}
3.6.4 Component 的实现
本节中我们将编写 1 个 Component, 从 driver 和 chatter 两个 Channel 中读取消息,将两个消息结合后输出,其中Driver作为主消息channel。
CommonComponentSample 头文件如下:
#include <memory>#include "cyber/component/component.h"#include "test/proto/examples.pb.h"using apollo::cyber::Component;using apollo::cyber::ComponentBase;using apollo::cyber::test::proto::Driver;using apollo::cyber::test::proto::Chatter;// 有两个消息源,继承以Driver和Chatter为参数的Component模版类class CommonComponentSample : public Component<Driver, Chatter> {public:bool Init() override;// Proc() 函数的两个参数表示两个channel中的最新的信息bool Proc(const std::shared_ptr<Driver>& msg0,const std::shared_ptr<Chatter>& msg1) override;};// 将CommonComopnentSample注册在cyber中CYBER_REGISTER_COMPONENT(CommonComponentSample)
可以看到,此处继承了Component<Driver, Chatter>来读取两个 channel 中的两种格式的消息,Proc()函数参数与其相对应。以此类推,如果继承了Component<Driver, Chatter, Driver>,则Proc()函数应为 Proc(const std::shared_ptr<Driver>& msg0, const std::shared_ptr<Chatter>& msg1, const std::shared_ptr<Driver>& msg2)
CommonComponentSample 源码如下:
#include "test/common_component_example/common_component_example.h"// 在加载component时调用bool CommonComponentSample::Init() {AINFO << "Commontest component init";return true;}// 在主channel,也就是Driver有消息到达时调用bool CommonComponentSample::Proc(const std::shared_ptr<Driver>& msg0,const std::shared_ptr<Chatter>& msg1) {// 将两个消息的序号格式化输出AINFO << "Start common component Proc [" << msg0->msg_id() << "] ["<< msg1->seq() << "]";return true;}
3.6.5 配置文件
本节讲解 Component 的配置文件(DAG)的编写。
dag 配置文件如下所示:
module_config {module_library : "/opt/apollo/neo/packages/test-dev/latest/lib/libcommon_component_example.so"components {class_name : "CommonComponentSample"config {name : "common"readers {channel: "/apollo/driver"}readers {channel: "/apollo/chatter"}}}}
module_library:指向 Component 编译后得到的.so文件的存放目录。components:表示 Component 的类型,除了components外,还有一种是timer_component,将会在下个例子中讲解。class_name:表示被加载的 Component 的类名,在这个例子中是CommonComponentSample。name:表示被加载的类在 Cyber 中的标识名。readers:表示 Component 所读取的 Channel ,与其继承的基类读取的类型一一对应。
launch 文件如下所示:
<cyber><module><name>common</name><dag_conf>/opt/apollo/neo/packages/test-dev/latest/common_component_example/conf/common.dag</dag_conf><process_name>common</process_name></module></cyber>
<name>:表示加载的 Component 在 Cyber 中的标识名,与 dag 文件中的name字段对应。
<dag_conf>:表示 dag 配置文件路径。
<process_name>:表示启动后的线程名,与线程名相同的 component 会在此线程中运行。
3.6.6 编译文件
Component 和 2 个 writer 的 BUILD 文件如下所示:
load("@rules_cc//cc:defs.bzl", "cc_binary", "cc_library")load("//tools/install:install.bzl", "install", "install_src_files")load("//tools:cpplint.bzl", "cpplint")package(default_visibility = ["//visibility:public"])cc_binary(name = "libcommon_component_example.so",linkshared = True,linkstatic = True,deps = [":common_component_example_lib"],)cc_library(name = "common_component_example_lib",srcs = ["common_component_example.cc"],hdrs = ["common_component_example.h"],visibility = ["//visibility:private"],deps = ["//cyber","//test/proto:examples_cc_proto",],alwayslink = True,)cc_binary(name = "driver_writer",srcs = ["driver_writer.cc"],linkstatic = True,deps = ["//cyber","//test/proto:examples_cc_proto",],)cc_binary(name = "chatter_writer",srcs = ["chatter_writer.cc"],linkstatic = True,deps = ["//cyber","//test/proto:examples_cc_proto",],)filegroup(name = "conf",srcs = [":common.dag",":common.launch",],)
接下来我们对例子进行编译
buildtool build -p test/common_component_example/
3.6.7 运行
完成编译后,我们就可以运行 Cyber 并加载 Component了,如上文所说,Cyber 会根据配置文件来加载 Component。Cyber 提供了两种加载 Component 的方法:
方法一、使用mainboard启动:mainboard -d <path/to/dag>,在这个例子中,运行的命令是
mainboard -d test/common_component_example/common.dag
方法二、使用cyber_launch启动:cyber_launch start <path/to/launch>,在这个例子中,运行的命令是
cyber_launch start test/common_component/common.launch
我们推荐使用cyber_launch的方法运行 component,首先我们需要开启三个命令行,每个命令行的命令如下所示:
- 命令行1:用于启动 driver_writer
export GLOG_alsologtostderr=1./bazel-bin/test/common_component_example/driver_writer
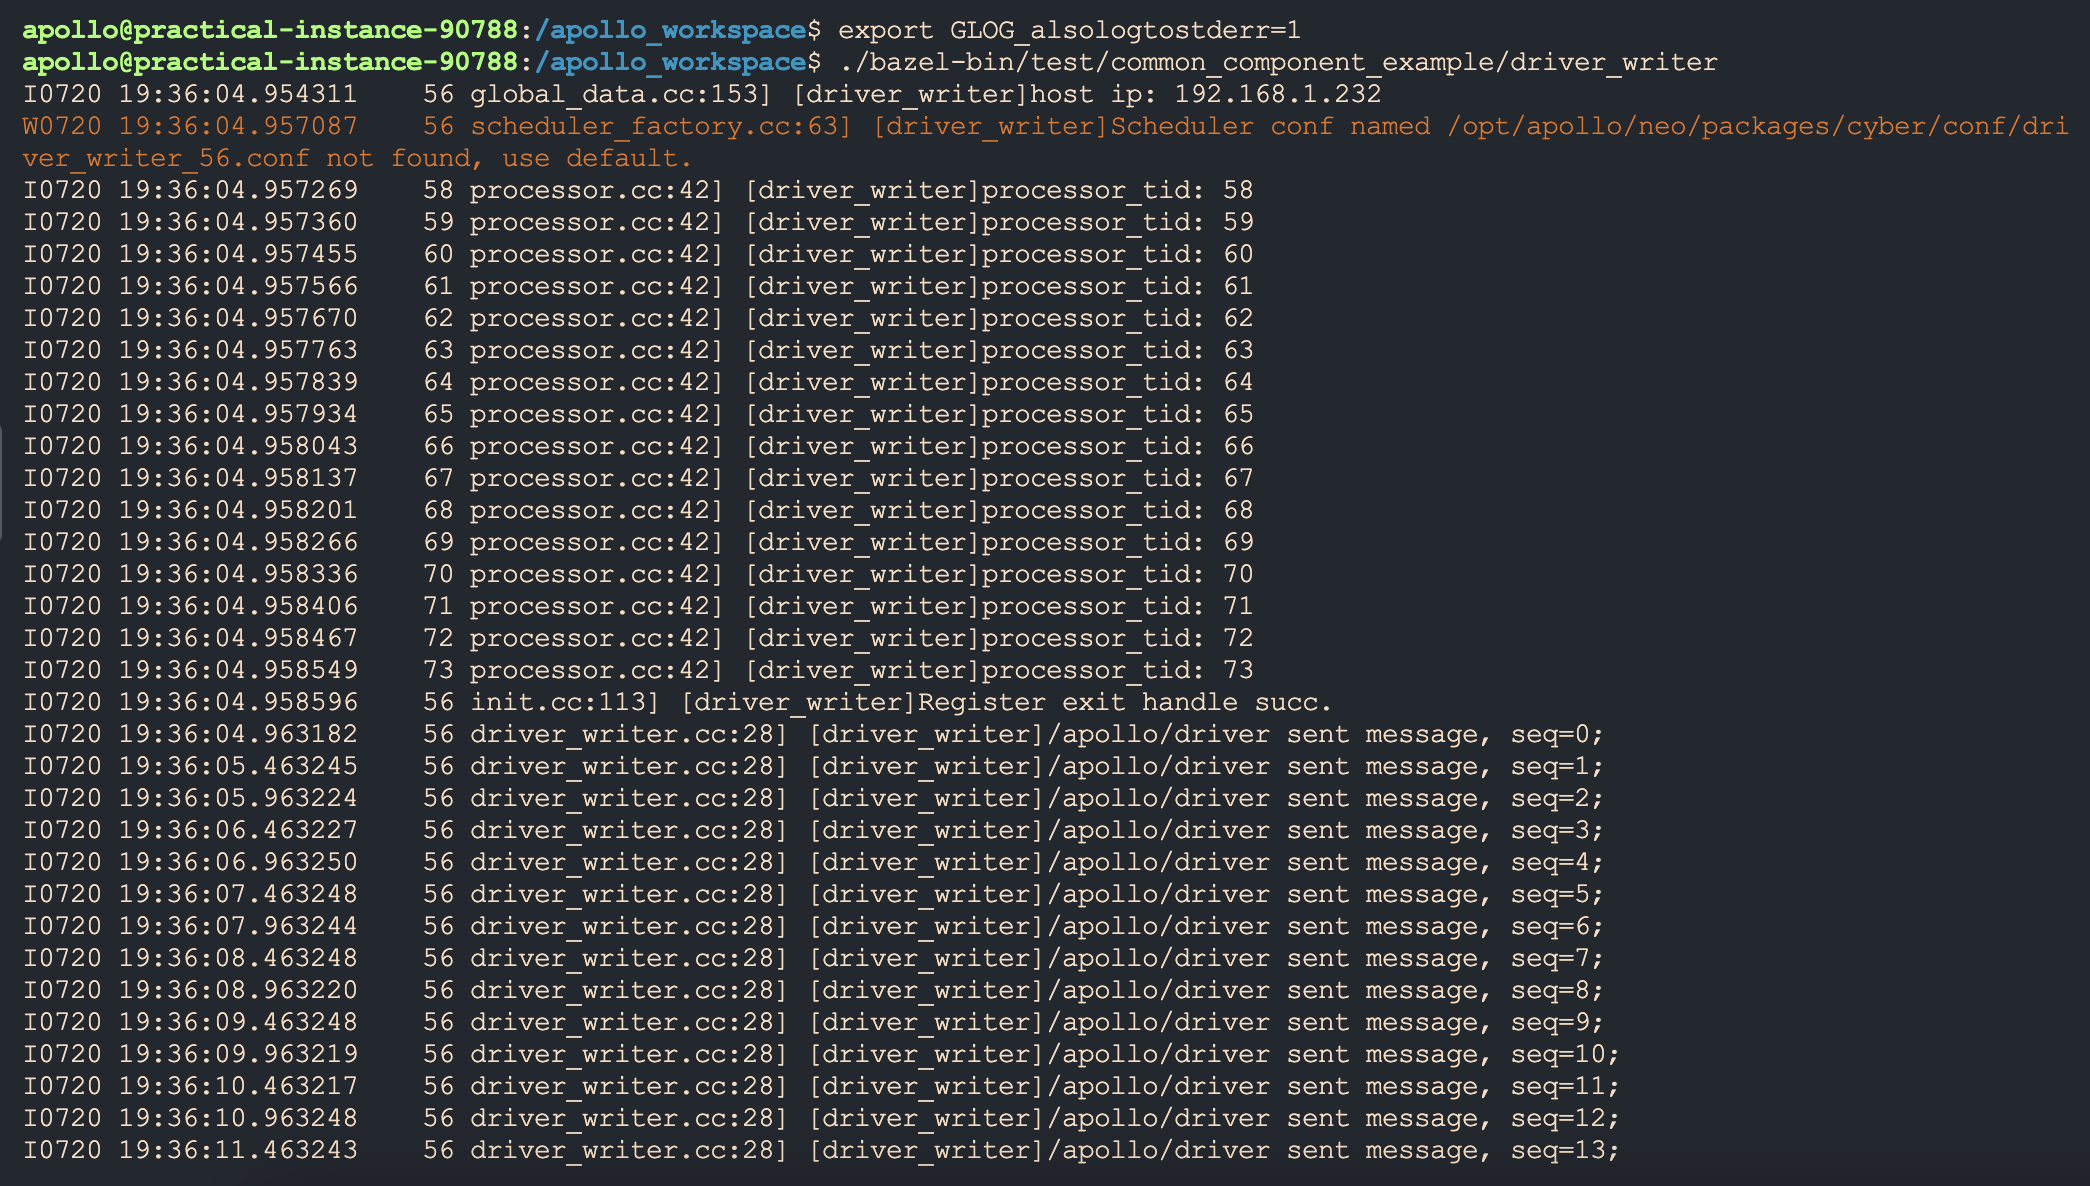
driver_writer每发出一条消息,就打印该条消息的编号到屏幕上。
- 命令行2:用于启动 chatter_writer
export GLOG_alsologtostderr=1./bazel-bin/test/common_component_example/chatter_writer
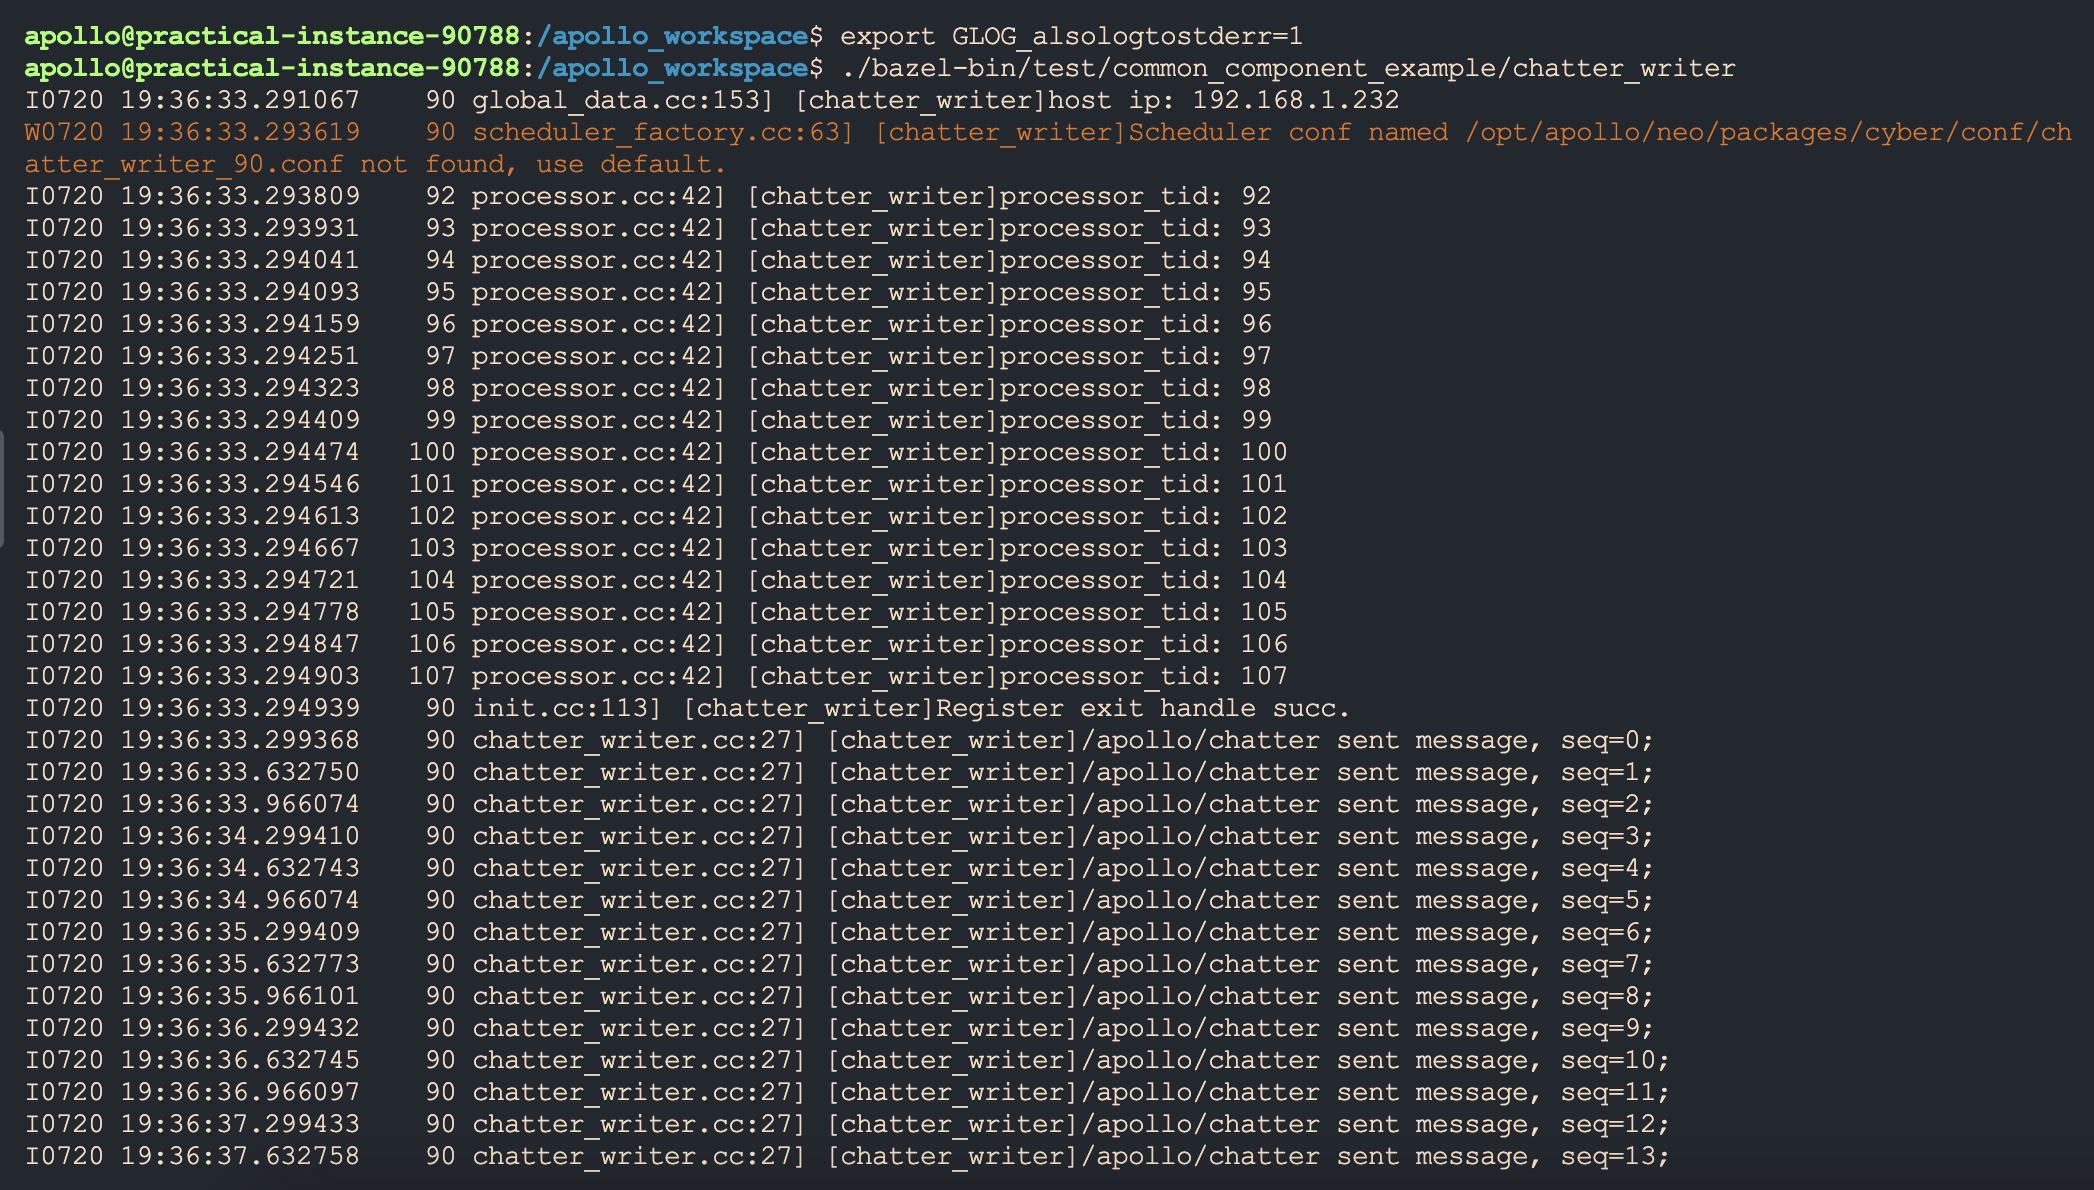
chatter_writer每发出一条消息,就打印该条消息的编号到屏幕上。
- 命令行 3 :用于启动 CommonComponentSample组建。
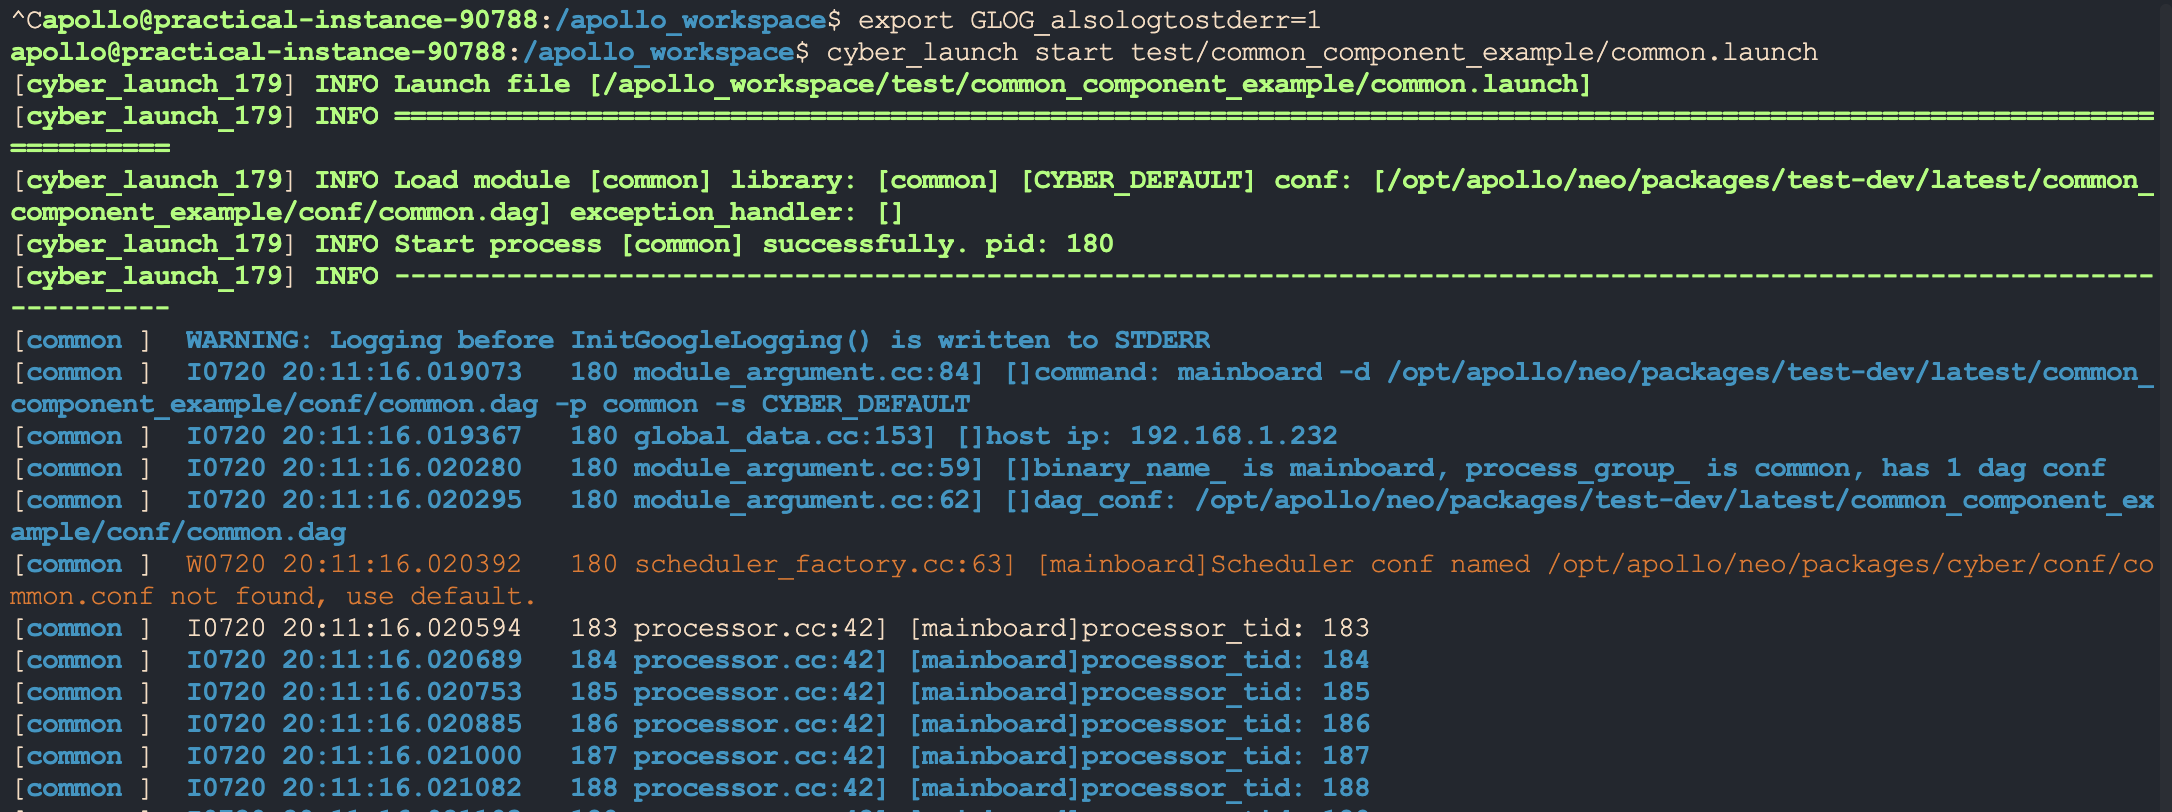
export GLOG_alsologtostderr=1cyber_launch start test/common_component_example/common.launch
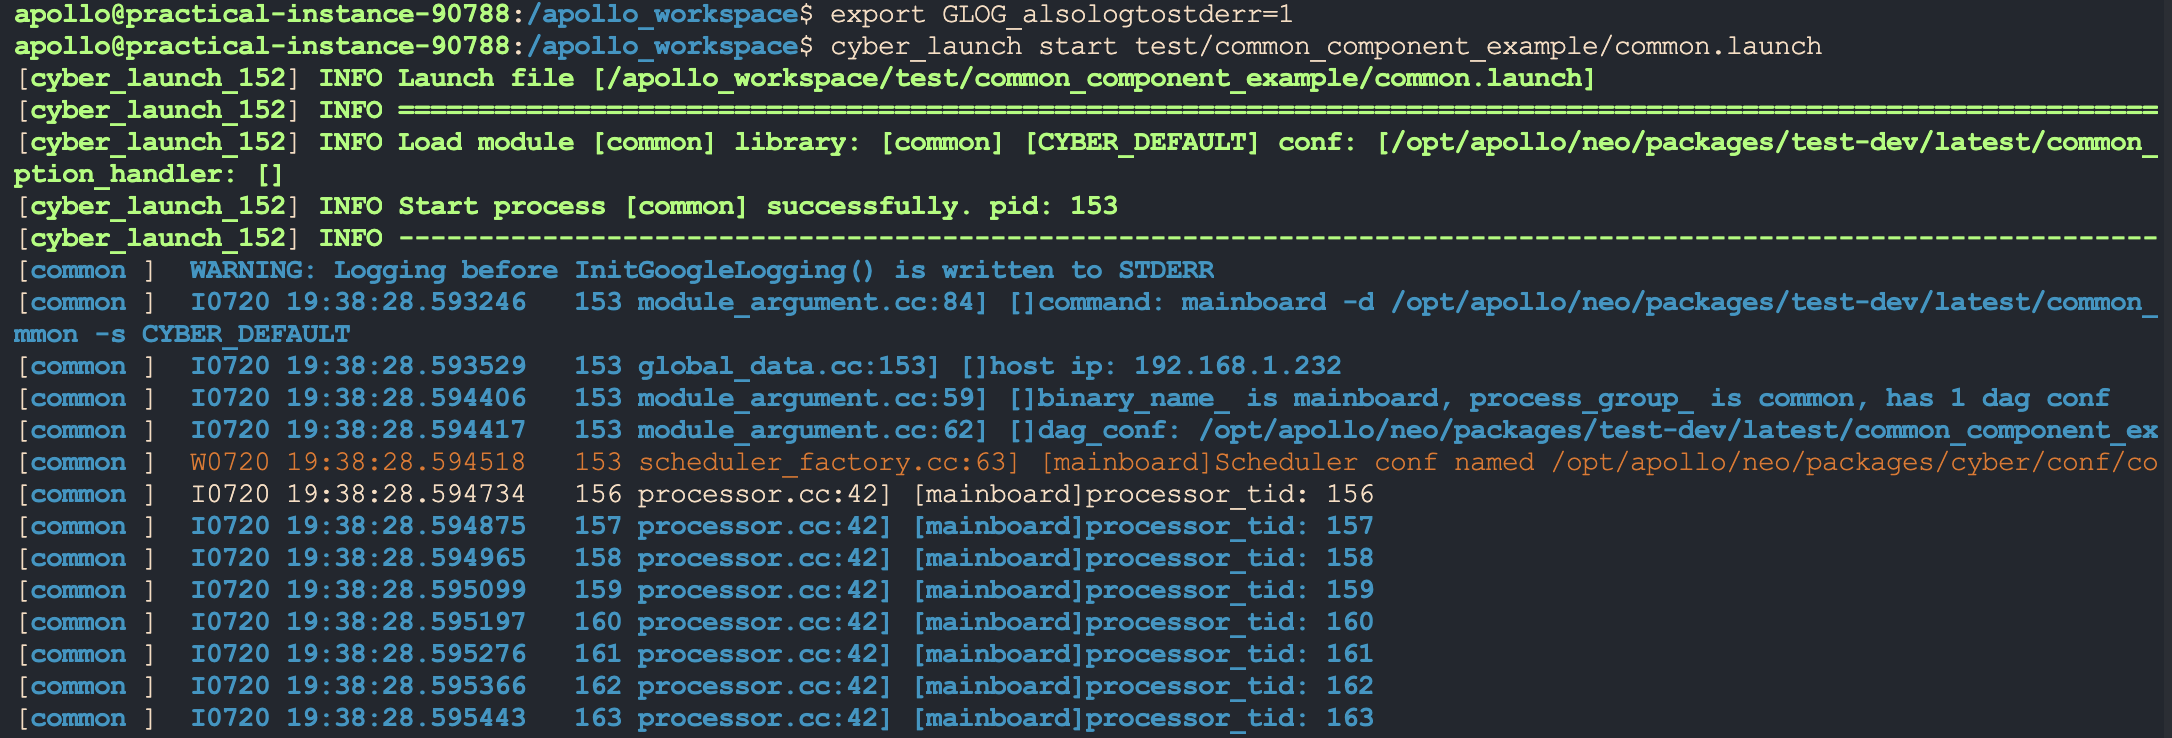
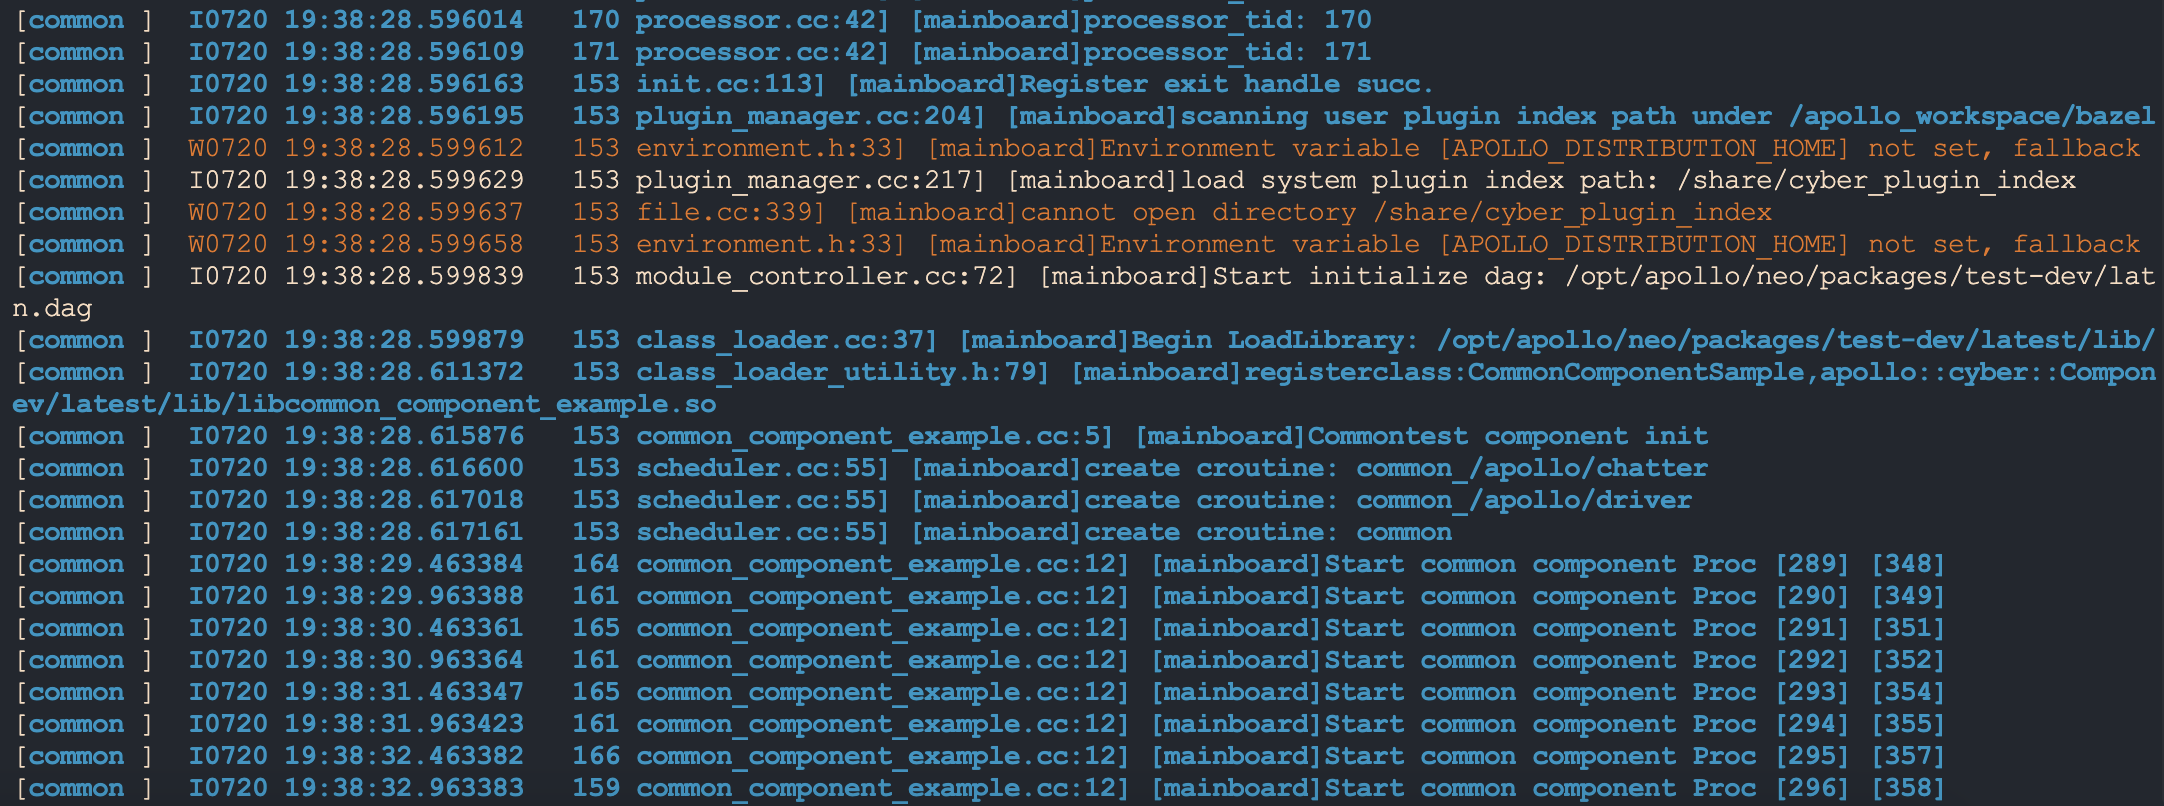
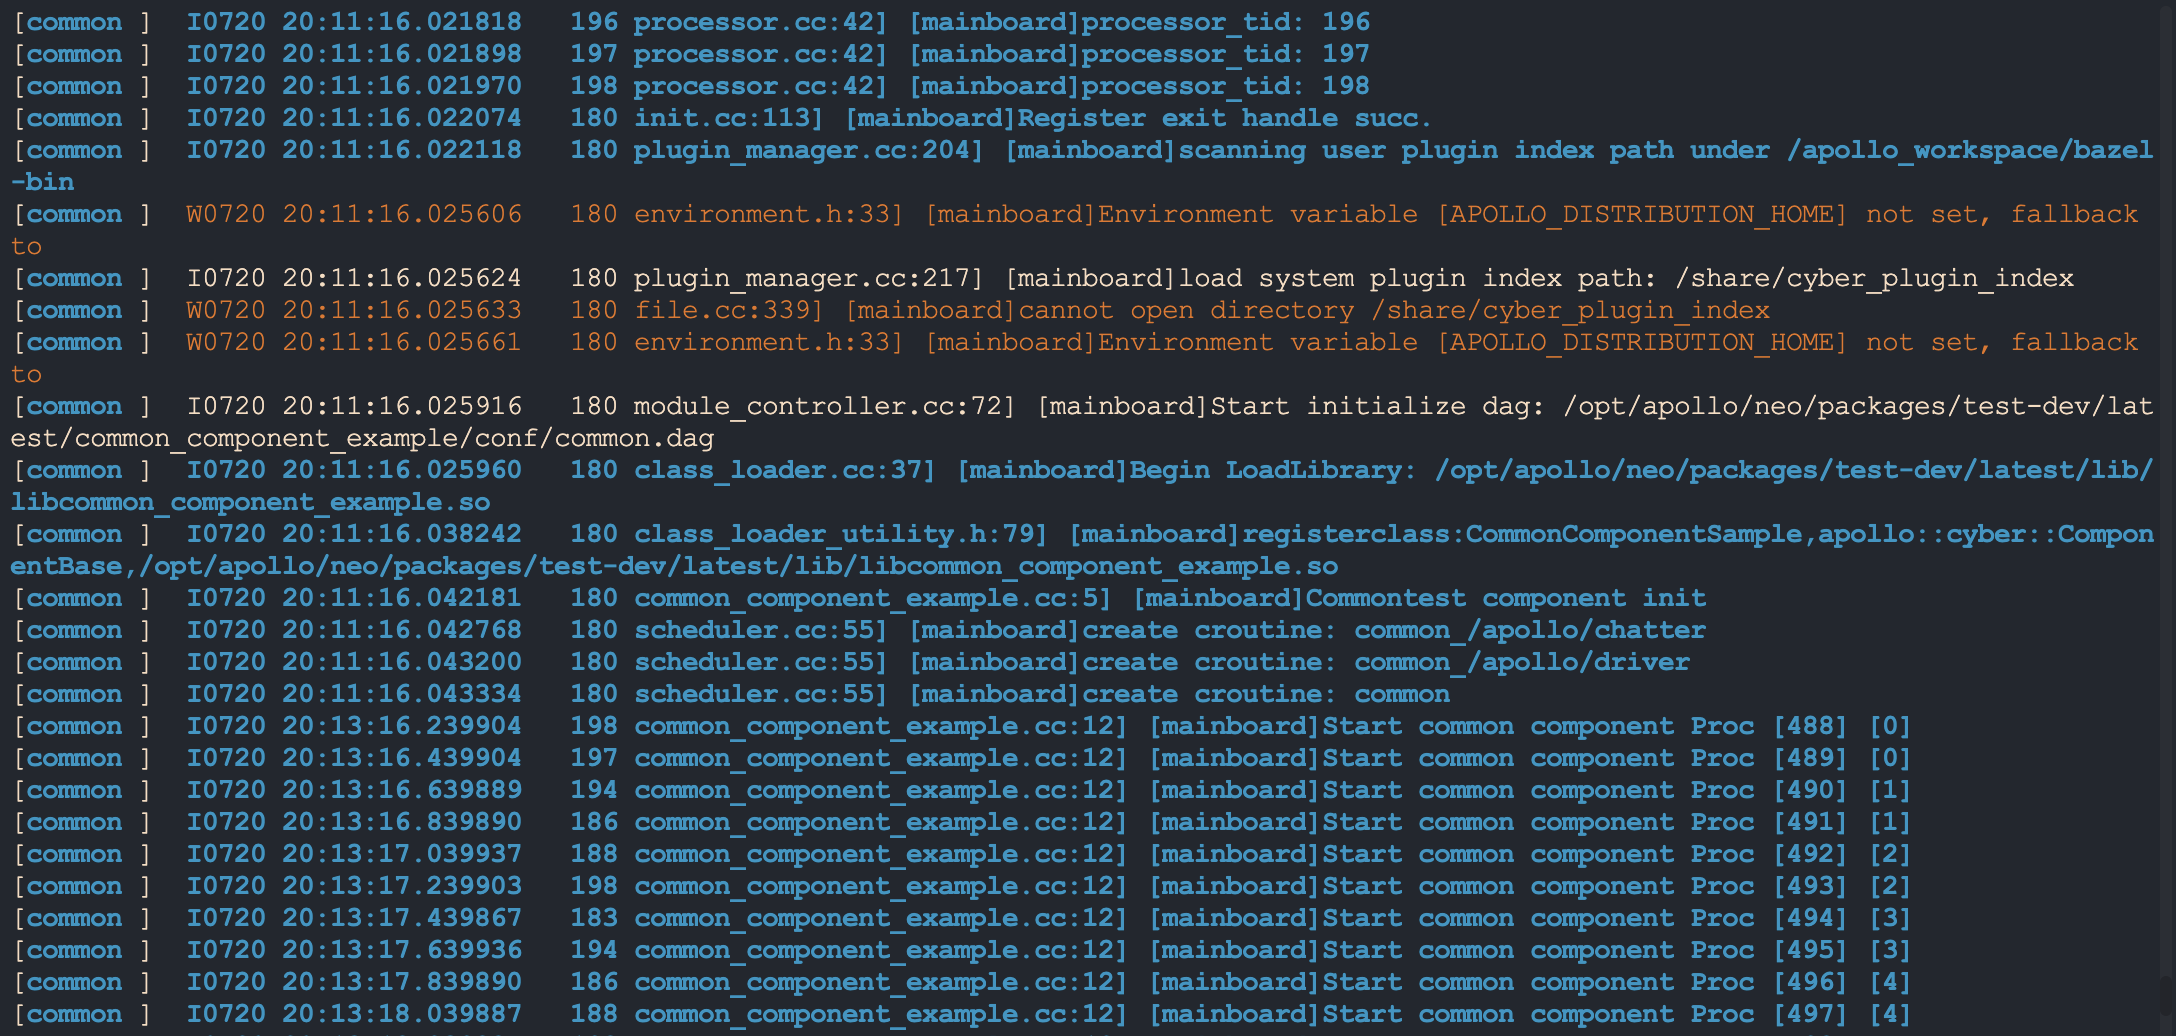
CommonComponentSample每接受到一次主channel信息,执行一次Proc()函数,Proc()函数执行消息融合逻辑依次打印出两路消息的编号到屏幕上。
可以看到CommonComponentSample打印到屏幕上的信息,其中主channel信息(Driver信息)编号是依次递增的,而非主channel信息(Chatter信息)编号会出现缺失或者重复,这是因为component的Proc()函数只有主channel消息到达时才会触发执行,Proc()函数执行时会读取所有融合channel最新消息。
3.7 TimerComponent 案例
在本节中,我们会实现两个TimerComponent,分别是TimerDriverSample和TimerChatterSample,用来替换掉上一个案例中的两个 Writer。
3.7.1 创建目录
apollo_workspace|--test|--timer_component_example|--BUILD|--timer_chatter.h // TimerChatterSample 头文件|--timer_chatter.cc // TimerChatterSample 源文件|--timer_driver.h // TimerDriverSample 头文件|--timer_driver.cc // TimerDriverSample 源文件|--driver.dag // TimerDriverSample 配置文件|--driver.launch // TimerDriverSample launch文件|--chatter.dag // TimerChatterSample 配置文件|--chatter.launch // TimerChatterSample launch文件
3.7.2 TimerComponent 实现
timer_chatter 头文件如下所示:
#include <memory>#include "cyber/class_loader/class_loader.h"#include "cyber/component/component.h"#include "cyber/component/timer_component.h"#include "test/proto/examples.pb.h"using apollo::cyber::Component;using apollo::cyber::ComponentBase;using apollo::cyber::TimerComponent;using apollo::cyber::Writer;using apollo::cyber::test::proto::Chatter;class TimerChatterSample : public TimerComponent {public:bool Init() override;bool Proc() override;private:std::shared_ptr<Writer<Chatter>> chatter_writer_ = nullptr;};CYBER_REGISTER_COMPONENT(TimerChatterSample)
- 可以看到,TimeChatterComponent 需要继承
TimerComponent基类,代码结构与普通的 Component 几乎相同。 - 不同的是因为没有数据源,所以没有模版参数。
timer_chatter 源文件如下所示:
#include "test/timer_component_example/timer_chatter.h"#include "cyber/class_loader/class_loader.h"#include "cyber/component/component.h"#include "test/proto/examples.pb.h"bool TimerChatterSample::Init() {chatter_writer_ = node_->CreateWriter<Chatter>("/apollo/chatter");return true;}bool TimerChatterSample::Proc() {static int i = 0;auto out_msg = std::make_shared<Chatter>();out_msg->set_seq(i++);chatter_writer_->Write(out_msg);AINFO << "timer_chatter: Write chattermsg->"<< out_msg->ShortDebugString();return true;}
- TimerChatter 在
Init()中初始化了 Writer,并在Proc()中向 Channel 中写信息。
timer_driver 的内容与 timer_chatter 内容非常类似,其头文件如下所示:
#include <memory>#include "cyber/class_loader/class_loader.h"#include "cyber/component/component.h"#include "cyber/component/timer_component.h"#include "test/proto/examples.pb.h"using apollo::cyber::Component;using apollo::cyber::ComponentBase;using apollo::cyber::TimerComponent;using apollo::cyber::Writer;using apollo::cyber::test::proto::Driver;class TimerDriverSample : public TimerComponent {public:bool Init() override;bool Proc() override;private:std::shared_ptr<Writer<Driver>> driver_writer_ = nullptr;};CYBER_REGISTER_COMPONENT(TimerDriverSample)
timer_driver 源文件如下所示:
#include "test/timer_component_example/timer_driver.h"#include "cyber/class_loader/class_loader.h"#include "cyber/component/component.h"#include "test/proto/examples.pb.h"bool TimerDriverSample::Init() {driver_writer_ = node_->CreateWriter<Driver>("/apollo/driver");return true;}bool TimerDriverSample::Proc() {static int i = 0;auto out_msg = std::make_shared<Driver>();out_msg->set_msg_id(i++);driver_writer_->Write(out_msg);AINFO << "timer_driver: Write drivermsg->"<< out_msg->ShortDebugString();return true;}
3.7.3 配置文件
timer_chatter 配置文件如下:
module_config {module_library : "/opt/apollo/neo/packages/test-dev/latest/lib/libtimer_chatter.so"timer_components {class_name : "TimerChatterSample"config {name : "timer_chatter"interval : 400}}}
interval:表示 TimerComponent 执行Proc()的间隔,此配置中为 400 ms 执行一次。- 因为没有数据融合,所以没有
readers字段 - 其余配置和普通 Component 相同
timer_chatter launch 文件如下:
<cyber><module><name>timer_chatter</name><dag_conf>/opt/apollo/neo/packages/test-dev/latest/timer_component_example/conf/chatter.dag</dag_conf><process_name>timer_chatter</process_name></module></cyber>
- 其内容和普通 Component 相同
timer_driver 配置文件如下:
module_config {module_library : "/opt/apollo/neo/packages/test-dev/latest/lib/libtimer_driver.so"timer_components {class_name : "TimerDriverSample"config {name : "timer_driver"interval : 200}}}
TimerDriverSample的Proc()每 200 ms 执行一次
timer_driver launch 文件如下:
<cyber><module><name>timer_driver</name><dag_conf>/opt/apollo/neo/packages/test-dev/latest/timer_component_example/conf/driver.dag</dag_conf><process_name>timer_driver</process_name></module></cyber>
3.7.4 编译文件
load("@rules_cc//cc:defs.bzl", "cc_binary", "cc_library")load("//tools/install:install.bzl", "install", "install_src_files")load("//tools:cpplint.bzl", "cpplint")package(default_visibility = ["//visibility:public"])cc_binary(name = "libtimer_driver.so",linkshared = True,linkstatic = True,deps = [":timer_driver_lib"],)cc_library(name = "timer_driver_lib",srcs = ["timer_driver.cc"],hdrs = ["timer_driver.h"],deps = ["//cyber","//test/proto:examples_cc_proto",],alwayslink = True,)filegroup(name = "driver_conf",srcs = [":driver.dag",":driver.launch",],)install(name = "driver_install",data = [":driver_conf",],data_dest = "test/timer_component_example/conf",library_dest = "test/lib",targets = [":libtimer_driver.so",],)cc_binary(name = "libtimer_chatter.so",linkshared = True,linkstatic = True,deps = [":timer_chatter_lib"],)cc_library(name = "timer_chatter_lib",srcs = ["timer_chatter.cc"],hdrs = ["timer_chatter.h"],deps = ["//cyber","//test/proto:examples_cc_proto",],alwayslink = True,)filegroup(name = "chatter_conf",srcs = [":chatter.dag",":chatter.launch",],)install(name = "chatter_install",data = [":chatter_conf",],data_dest = "test/timer_component_example/conf",library_dest = "test/lib",targets = [":libtimer_chatter.so",],)install(name = "install",deps = [":chatter_install",":driver_install"])install_src_files(name = "install_src",src_dir = ["."],dest = "test/src/timer_component_example",filter = "*",)96,1 Bot
接着,运行如下命令编译:
buildtool build -p test/timer_component_example/
3.7.5 运行
我们实现的两个 TimerComponent 可以用来替代上一个案例中的两个定时写消息的 Writer,启动方法也与上一案例类似,不同的是 TimerComponent 可以通过配置文件配置。
类似地,先启动三个命令行,每个命令行命令如下:
- 命令行 1 用于启动 CommonComponentSample
export GLOG_alsologtostderr=1cyber_launch start test/common_component_example/common.launch
CommonComponentSample每接受到一次主channel信息,执行一次Proc()函数,Proc()函数执行消息融合逻辑依次打印出两路消息的编号到屏幕上。
- 命令行 2 用于启动 TimerDriverSample
export GLOG_alsologtostderr=1cyber_launch start test/timer_component_example/driver.launch
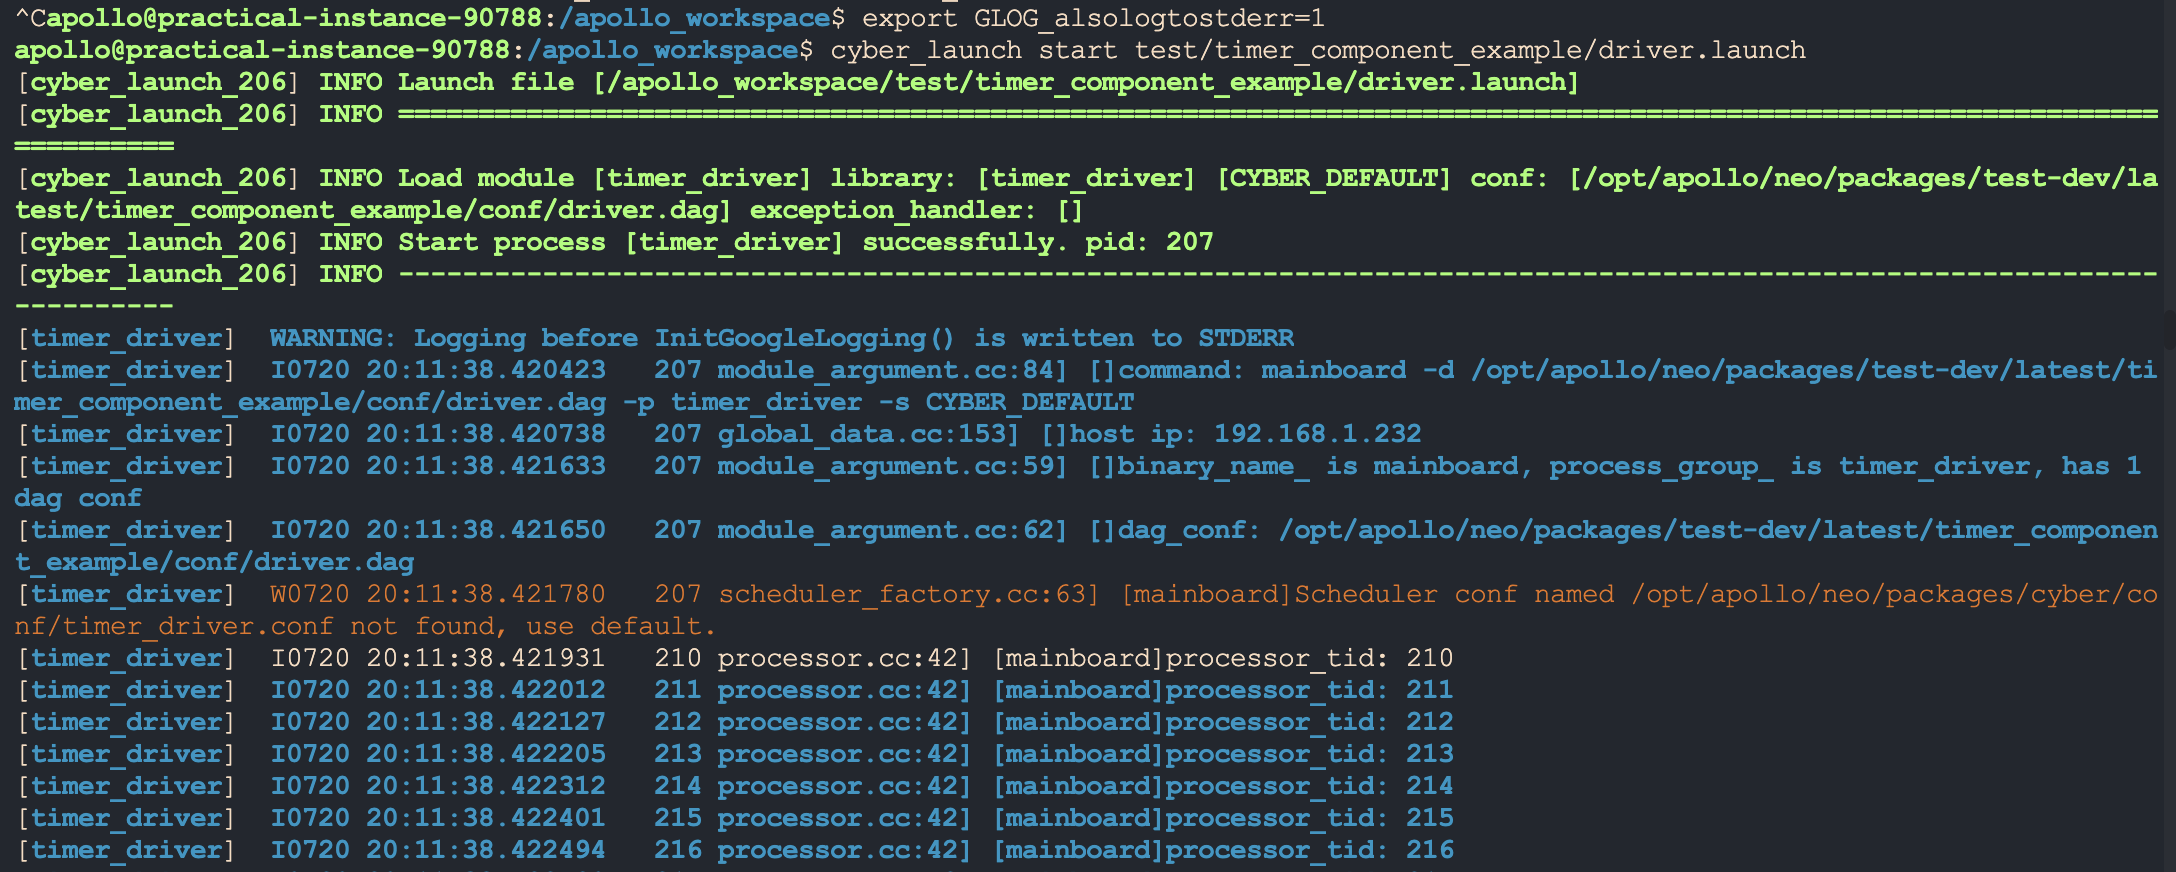
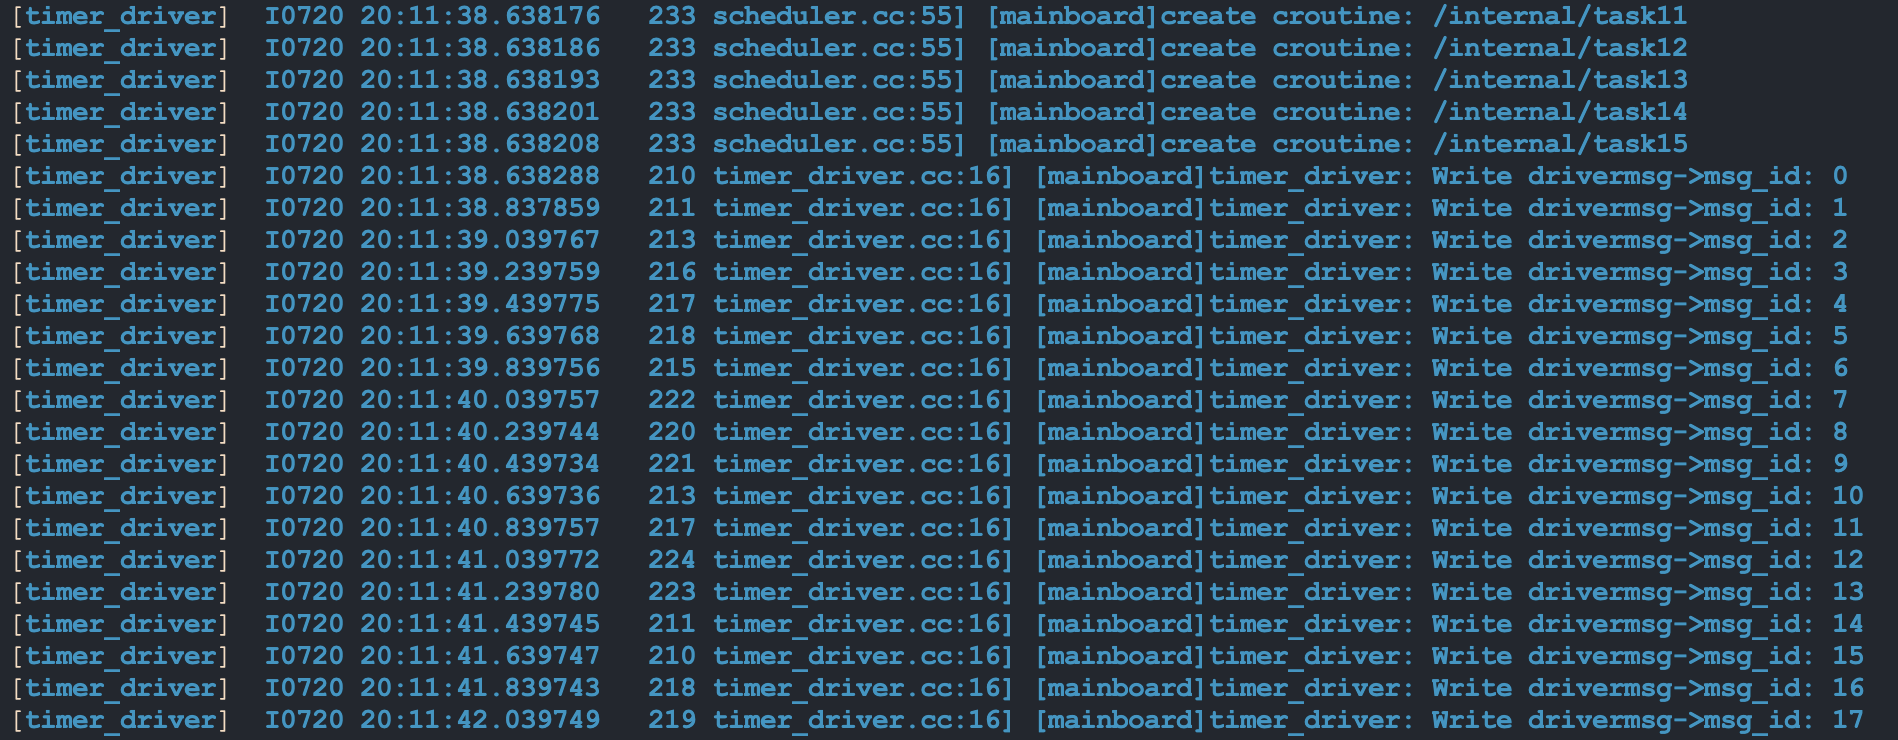
TimerDriverSample每隔200ms,由系统定时器调用Proc()函数,Proc()函数每执行一次就发出一条消息。并打印该条消息的编号到屏幕上。
- 命令行 3 用于启动 TimerChatterSample
export GLOG_alsologtostderr=1cyber_launch start test/timer_component_example/chatter.launch
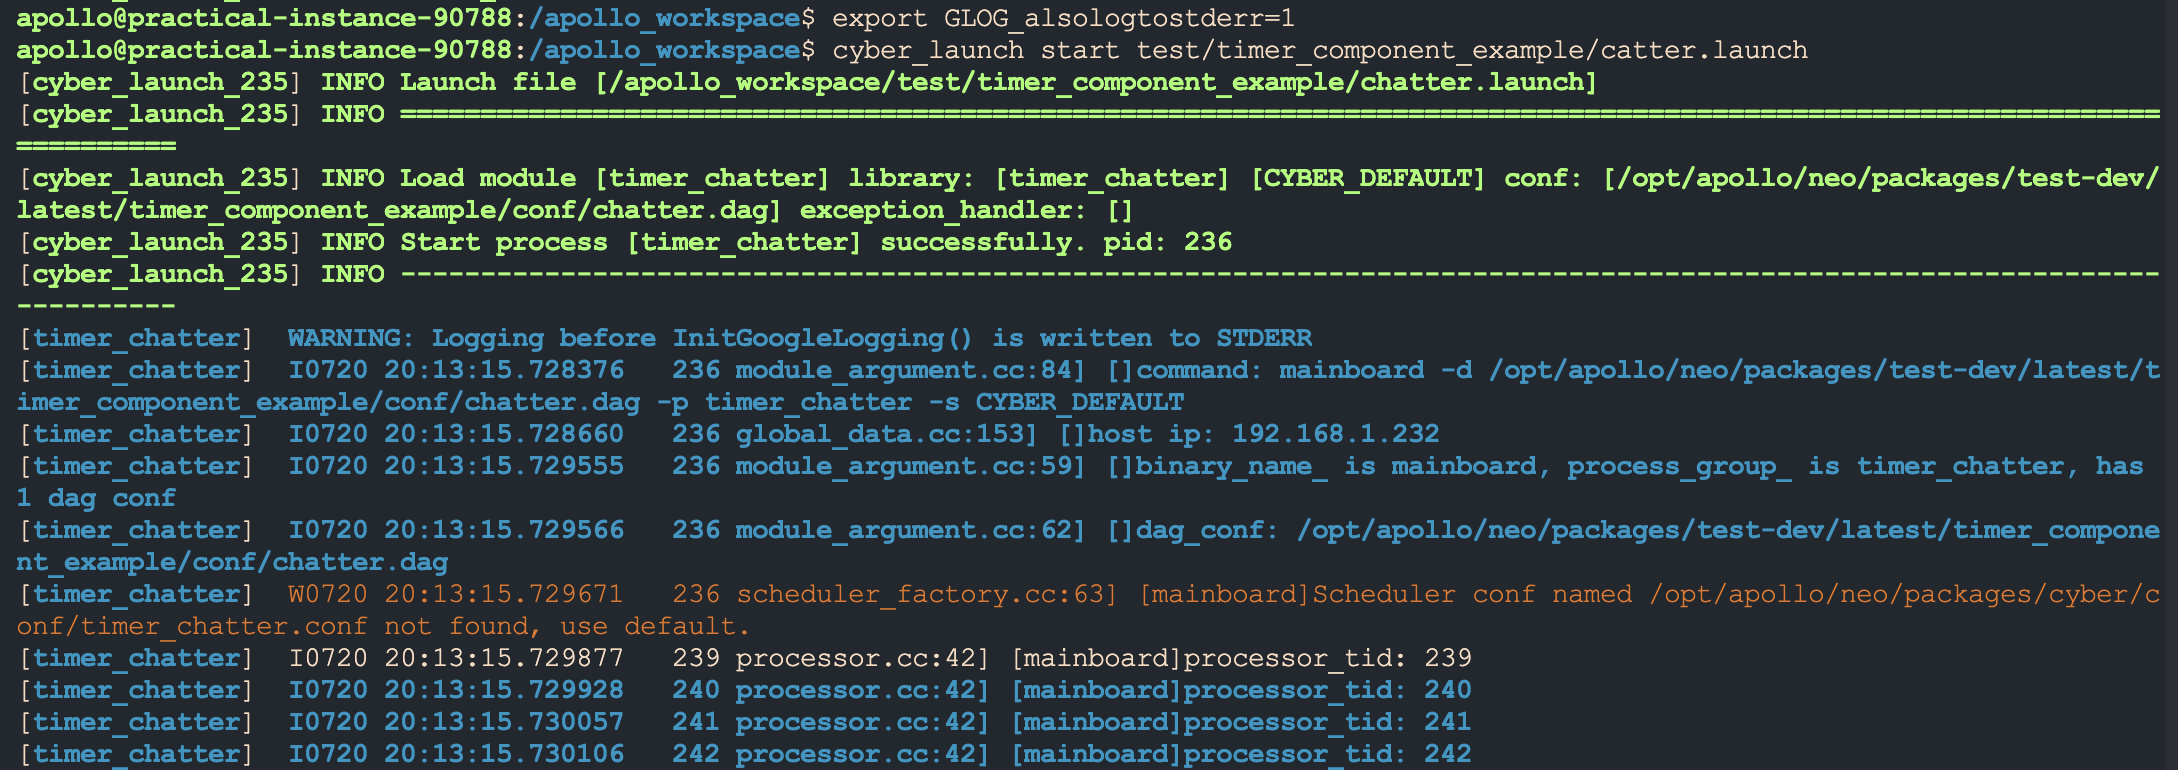
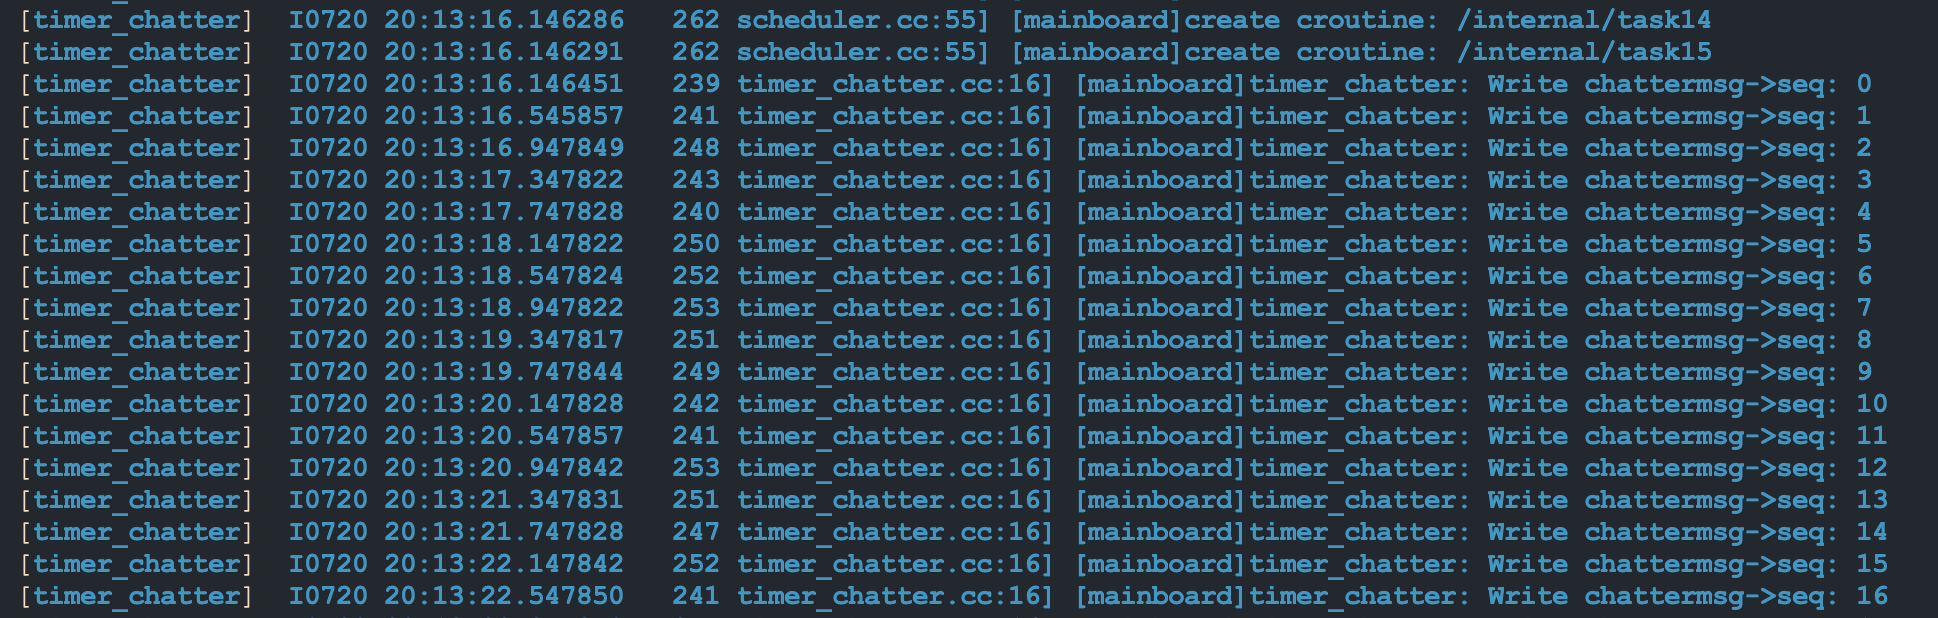
TimerChatterSample每隔400ms,由系统定时器调用Proc()函数,Proc()函数每执行一次就发出一条消息。并打印该条消息的编号到屏幕上。